
How to Create a Layout Using Microsoft Word
New to creating a layout for digital ceramic transfers?
You’ve got your images, you know they’re the correct resolution, you even know the dimensions of our printing area, but you don’t have Adobe Photoshop and you’re not sure how to organise the page.
That’s totally fine; the layout for your sheet of transfers can also be created using Microsoft Word, this post will walk you through some of the steps needed to do that.
You may be using a different version of Word, so don’t panic if what you’re seeing isn’t exactly the same, you’ll still be able to create the layout.
First thing’s first, you want to make sure that your page is the correct size; you don’t want to create the whole layout, only to later find out that you were working in A4.
To do this, you will need to select ‘layout’ from your taskbar at the top of the page, then select ‘size,’ and ‘more paper sizes,’ as seen below:

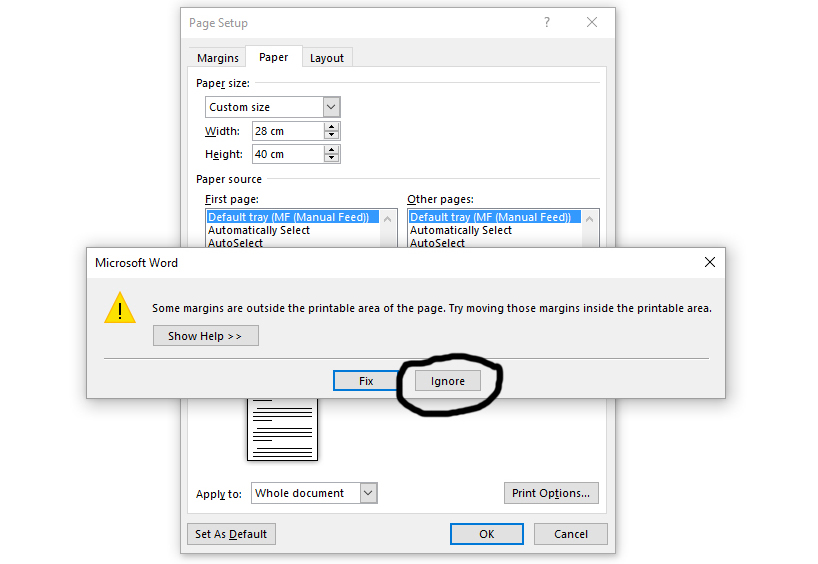
You will then progress to a screen which allows you to set the dimensions of the page, type 28cm into width and 40cm for height, this will give you a blank page set to our printing area; you can enter the numbers the other way around, this will give you a landscape page. Don’t forget that the page margins will be included in this size.

When you press ‘OK’ an error message may appear, ignore it, this would only apply if you were going to print the page yourself.
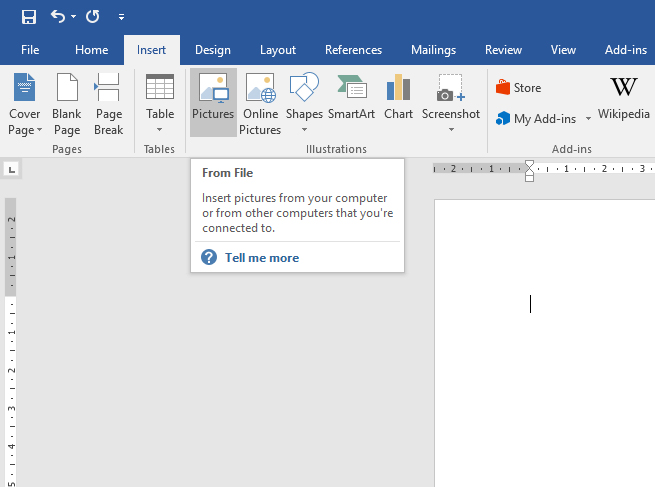
Next, you’ll want to start placing your images on the page, this part is pretty simple; ‘insert,’ ‘pictures.’
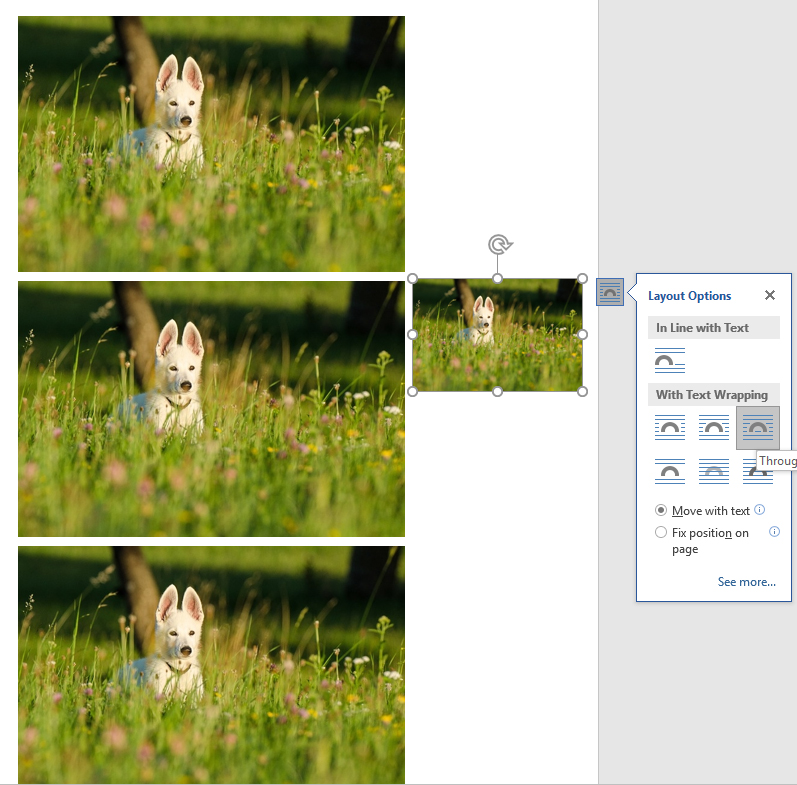
You’ve got your artwork on the page, but you want to make sure that it’s the right size? Just right click on the image, then select ‘Size and Position.’

You can then enter the height and width that you need the decals to be; leave ‘lock aspect ratio’ checked, otherwise the image will get distorted.

Once you’ve done the first one, follow the same steps for the others. You may want to use all of the space, but find that Word isn’t very lenient; you can get around this by right-clicking, hovering over ‘wrap text’ and selecting ‘through.’ There are also a couple of other ways to do this, they will all give the same result.
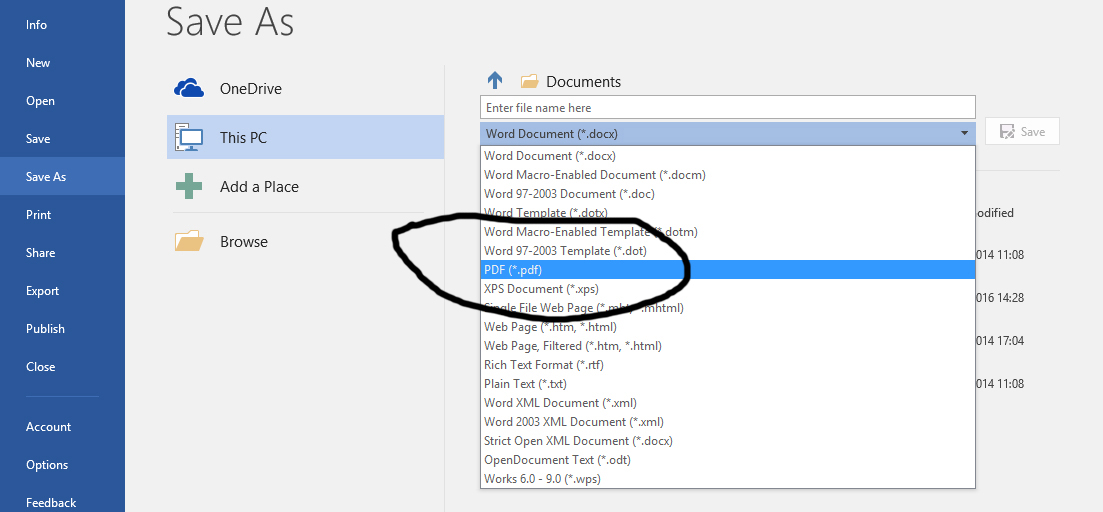
Now that your layout is complete, you’ll need to save it to be sent to us; the best way to do this, while preserving your layout, is to save it as a PDF.
Click ‘file,’ ‘save as,’ then set the file type to PDF.
To be on the safe side, if you have created your layout this way, always let us know the intended dimensions of your images, and if you have any problems just get in touch.
Follow this link for information on the next steps, and to upload your layout http://www.fotoceramic.com/p/big_file_upload.php